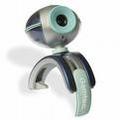
 So you have a webcam. Maybe it came with your computer, or you just went
out and bought one, or maybe you're about to go get one. In any event,
you want to know what to do with it. Well, you've come to the right place. So you have a webcam. Maybe it came with your computer, or you just went
out and bought one, or maybe you're about to go get one. In any event,
you want to know what to do with it. Well, you've come to the right place.
 First off, a word of warning before you do anything. BE CAREFUL!! No
matter how voluntary this might be, you are opening a visual window into
your life that people on the internet will be able to see into. You can
control who watches, and when they watch and how they watch and what they're
looking at, but regardless of all that, you must be aware that this makes
you, however slightly, more vulnerable than you were before. Anything that
anyone is able to watch you do on the cam they will be able to record. And
anything that can be recorded can be passed on. And, well, you know very
well what happens to something once it gets loose on the internet. Anyway,
just be careful of what you do... and what you show. And now that we have
that out of the way, lets get the cam set up! First off, a word of warning before you do anything. BE CAREFUL!! No
matter how voluntary this might be, you are opening a visual window into
your life that people on the internet will be able to see into. You can
control who watches, and when they watch and how they watch and what they're
looking at, but regardless of all that, you must be aware that this makes
you, however slightly, more vulnerable than you were before. Anything that
anyone is able to watch you do on the cam they will be able to record. And
anything that can be recorded can be passed on. And, well, you know very
well what happens to something once it gets loose on the internet. Anyway,
just be careful of what you do... and what you show. And now that we have
that out of the way, lets get the cam set up!
Step 1: A Bit of History
Webcams used to be much harder. Back in the mid 90's when webcams started
showing up online, webcams didn't come packaged in plastic cases sold in
every store. You would have to use a camcorder or other analog camera. You
would have to utilize some type of video capture system, and then find some
software that could extract a frame from that video, save the frame to disk,
manipulate the frame as needed, and then another process to send the
frame to a webserver somewhere where people on the internet could view it.
It wasn't at all abnormal to have only one update per minute, since
home broadband was about as common as webcams. Dialup doesn't push
large images very fast. And remember, back then, a 20K image was pretty
huge. It didn't take long for someone to create applicatiosn to make the
process easier, but for a few years, webcams, at least decent ones, cost
a couple hundred $$. Now, of course, they're cheap, and they're everywhere, and it's
nothing more than a footnote to history that there was a time not too long
ago when they didn't even exist.
Step 2: Purchasing the Cam
 If you haven't bought one yet, do a bit of research. If you're lucky enough
to have a decent computer friendly electronics store nearby such as Fry's,
you will have a selection of cams in a large range of prices and qualities.
If all you have nearby is a Radio Shack, you MIGHT have two options, if you're
lucky. Of course, you can always order one online, if you're a patient person.
If you're not concerned about quality, just get whatever you're willing to
pay for. The cheapest cams will suffer from two basic flaws. They'll have a
slow refresh, which means when you move it'll look like your body is skewed for
a moment as it doesn't update very smoothly. If you plan to play a statue, this
isn't likely to be a problem. The second issue would be, while almost all
of the cams will have a halfway decent picture if there is sufficient light,
the cheaper cams will look awful when its dark. If you want a decent quality
cam, plan to spend at least $50. If you REALLY want a nice image, and you
have a camcorder available, use that. If your camcorder has built in support
for the computer, such as a usb adapter, you might be able to use it directly
that way. Otherwise, you'll have to purchase a capture card and use the
video output on the camcorder as input to the capture card. This is a more
expensive solution, especially if you don't have a camcorder already, but
the image quality will be an order of magnitude better.
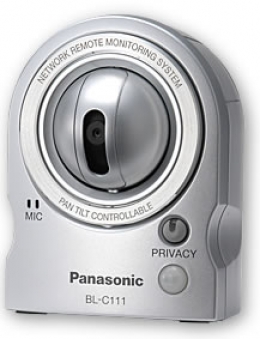
There are also other options available. You might wish to purchase a cam
that has pan/tilt/zoom capability. These start at about $100 for a complete
solution and run into the thousands. You can als purchase an IPcam. This type
of cam will not connect to your computer, but will instead connect to your
network, either via ethernet or WIFI. You can place such a camera anywhere
you have access to the network, and you don't need a computer nearby to make
it work. They also have a built in webserver that can serve up the image,
taking the place of some of the webcam softare that will be discussed
later. The downside of an IP cam is they cost more, and they're not very
good if you want to use the cam as a recording resource for a movie/video.
Step 3: Installing your Cam
Now you have your cam. Now you need to get the camera connected to the computer
or network, and install or download any necessary drivers to make it work. There should be
an installation guide with the camera, either separate or part of a larger
manual. If you purchased a USB cam, you will probably need to install the
driver software BEFORE you plug in the camera, especially on a Windows
machine. Those of you using Macintosh running OSX or something older,
I'm not going to be much help with, but follow your instructions and you'll
be fine.
Once you have all of the drivers are installed, if any applications are included with the software,
install those as well, so you have SOMETHING that shows you the cam works.
There's no sense in trying to mess with other software if you don't even know
if the cam is correctly installed. Of course, once it's installed, actually
USE one of these programs so you can see your grinning mug dancing around.
Step 4: Using your Cam
Now that you have it installed, what are you going to do with it? Since the
focus of this environment will tend to imply that you're looking to broadcast
it, that will be the bulk of the remainder of this document. However, even
if live broadcasting is not for you, there are other things you can do with
your cam.
You likely had some softare included with your cam that can record videos from
your cam source. You won't be producing the next blockbuster movie with your
$20 webcam, but you can at least make some short videos of you singing
and dancing to your favorite music. One you realize that this masterpiece
MUST be shared with the rest of the world, you can post this video on sites
such as YouTube.
Although the resolution is much lower and the quality far less crisp, you
can use your webcam as a poor man's digital camera and use it to import
captures into Microsoft Word, Photoshop, Gimp, or other photo manipulation
programs.
Due to their inexpensive cost and common placement, they also are useful for
video surveillance, either for monitoring or security purposes. Combined with
either one of the webcam broadcasting programs and a time capture script, or used with video security
software, you can monitor your home or workplace in realtime as well as
record video on or offsite for playback later in case of an incident.
Video conferencing is also becoming more common, with the internet making
telecommuting popular. Although teleconferences can be held entirely over
the phone, body language and other visual feedback is helpful toward having a
productive meeting.
Step 5: Broadcasting your Cam
The rest of this document will instruct you on doing a live broadcast of your cam.
Once again, you have several options available to you,
and you can generally do any/all of these things, and depending on the
software solutions you have installed, you might be able to do all of them
at the same time.
First off, you can use it in instant messenger (IM) programs
such as Yahoo IM, MSN, and others. This tends to be the safest option,
as you at least have to have SOME idea of who's watching. Of course, if you
let random strangers watch your relatively private cam via IM, you're probably past
worrying about intrusions into your privacy anyway.
Secondly, you can use webcam web services. Some examples are Stickam, Justin.tv,
Smotri, and many others, some of them with less.... family friendly
entertainment potential. Most of these services only require you to have the cam installed. They use
a built in feature of the flash plugin installed in virtually every browser to
broadcast the cam stream, so no addtional applications are required on your
part. They have a variety of privacy and abuse resolution options available.
These networks are popular and very public. While this is great if you're
trying to get an audience, realize that you're going to get all types,
including a lot of really creepy people. And that doesn't even include the
perverts, of which there are many more. Once again, be careful.
A third option is to run a webcam application server on your system and stream
the jpeg image to the internet as a script on a website somewhere, either on
your own, or on another one, such as Drivemeinsane.com. This application is
not dependant on a browser, and will give you many more options for image
manipulation and control over who is watching than other services will.
The mjpeg stream, while technically not as fast, CAN be as fast as the public
networks are typically so saturated that lag is the enemy of pretty much
everyone, no matter what the fps capability of the host is.
Step 6: Doing the DMI Thing
Of course, the first thing that ever popped into your head when you saw
this site was "I want to have my cam on DMI too!" The process of adding
your cam is explained in more detail elsewhere, but will be summarized briefly
here. You will first need to create a profile. Once that is done, you'll
need to click one of the Add your cam links all
over the site. This will require some work on getting an application set
up. When you're ready, read the link and follow the directions. If you
need assistance, contact Restil, one of the other administrators, or anyone
else who has a cam, and they'll be happy to help you.
|
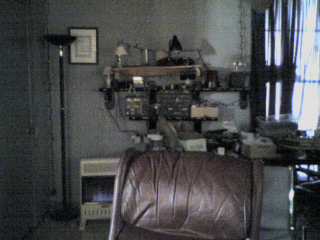
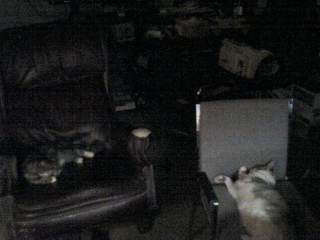
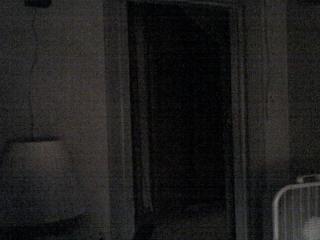
Cam Quality Comparison
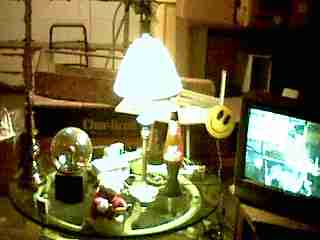
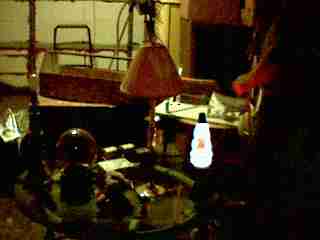
This is a small selection of images from various webcams with different
lighting conditions. This is by no means an exhaustive collection, nor should
it be considered an endorsement for any specific webcam.
USR BigPicture
Normal Lighting

|
Bright Lighting

|
Dim Lighting

|
Darkness

|
Old Camcorder with capture card
Normal Lighting

|
Bright Lighting

|
Dim Lighting

|
Darkness

|
$25 USB Cam
Normal Lighting
|
Bright Lighting

|
Dim Lighting
|
Darkness

|
Panasonic BL-C111
Normal Lighting
|
Bright Lighting

|
Dim Lighting
|
Darkness
|
|

